Tub Resurfacing is a process, which includes preparation work and applying several finish coats before complete. We specialize in both porcelain tub resurfacing as well as fiberglass tub refinishing. While some see tub resurfacing as an options, other must do it out of necessity. We get requests to help clients cosmetic appeal such as out dated colors: avocado, pink, or sea foam green; or to repair chips, peeling, or a dull finish. Others undergo tub resurfacing due to serious water damage from a leaking tub or sink. Whatever your reason for, we look forward to serving you. Our goal is to restore your tub and make it look like new and stay new for years to come.
We guarantee your tub for 5 years or we’ll come out and resurface it FREE.
Tub Resurfacing Process
Step 1: Care Guide
- Explain care and maintenance and care agreement.
- Remove all silicone around the tub and walls and tub.
- Rinse and apply acid wash, scrub, and remove tub residues
- Dry surface completely
- Rinse and Repeat
- Apply proprietary acid etch to the glazeThe Glaze is the shine off of the tub so the porcelain has millions of pits on the surface so that the top coat is not laying on the surface, but becoming part of the surface
- Rinse and scrub tub to remove etch residue
- Completely Dry the Tub
- Make chip repairs
- Sand all repairs
- Sand the tub
- Vacuum and dust tub for residual elements with a a ragthe rag must have a strong adhesive/sticky properties to remove all dust from the tub
- Completely cover/tape bathroom to protect surfaces
- Prep surface of tub
- Prime tub with Poly bond styrene gorilla grip primer.
- Roll textured slip resistant matt on bottom it is an option for safety
- Apply multiple coats of Acrylic Urethane, 1 quart cup for standard size tubs.
- Let coating dry for 25 to 35 minutes depending on room temperature and humidity.
- Unmask walls and recaulk tub
- Let tub dry 24 hours before it is put back into use
What We Can Fix
We can fix the following tub resurfacing issues:
- Outdated Colors
- Chips
- Cracks
- Pits
- Rust
- Scratches
- Divits
- Dulge
- Inconsistencies
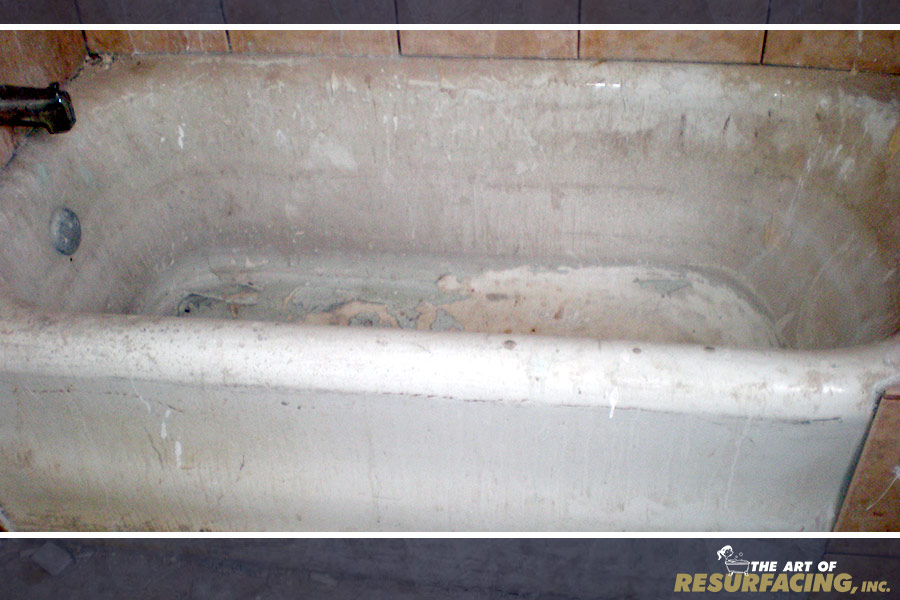
Before: Bathtub Resurfacing
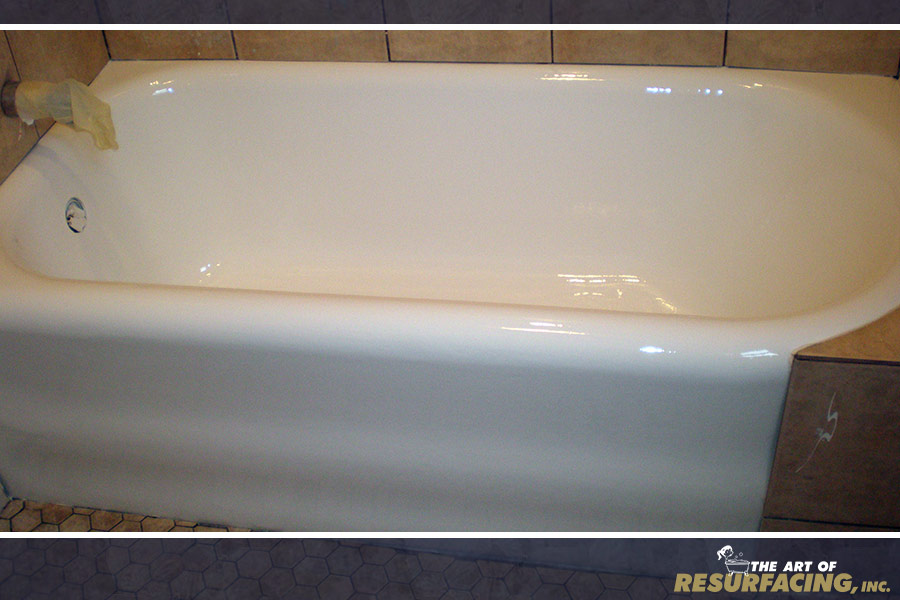
After: Bathtub Resurfacing
Before Resurfacing of Acrylic tub
After Resurfacing of Acrylic Tub
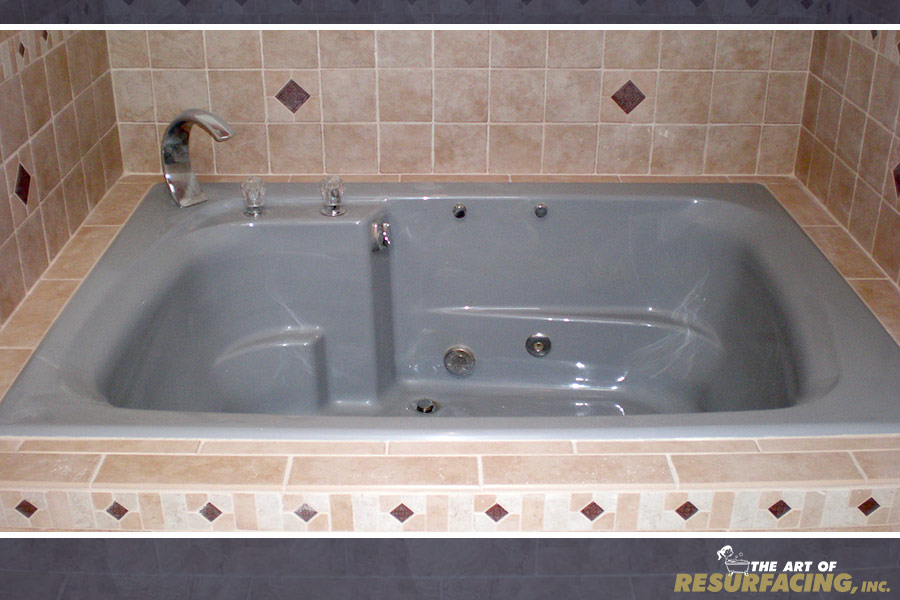
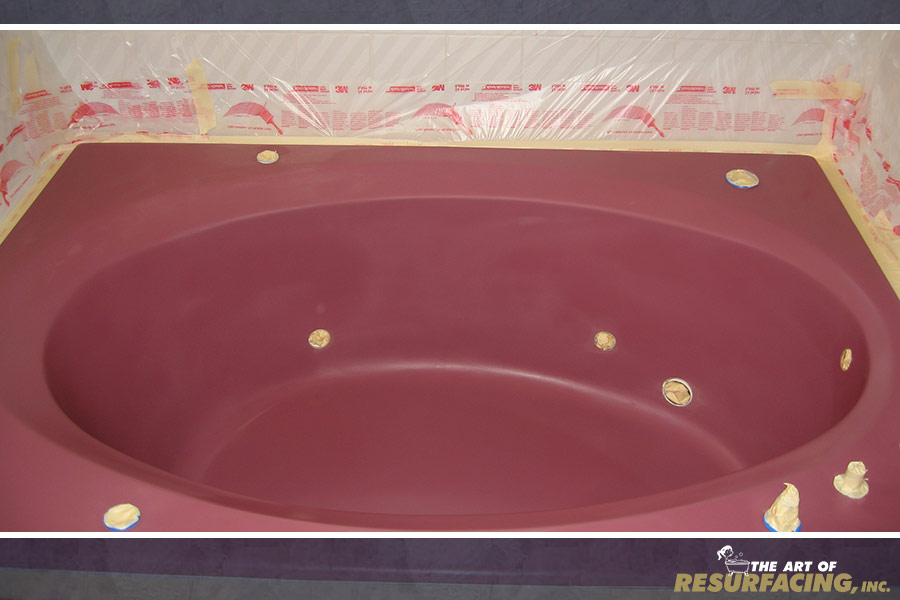
Before Jacuzzi Resurfacing
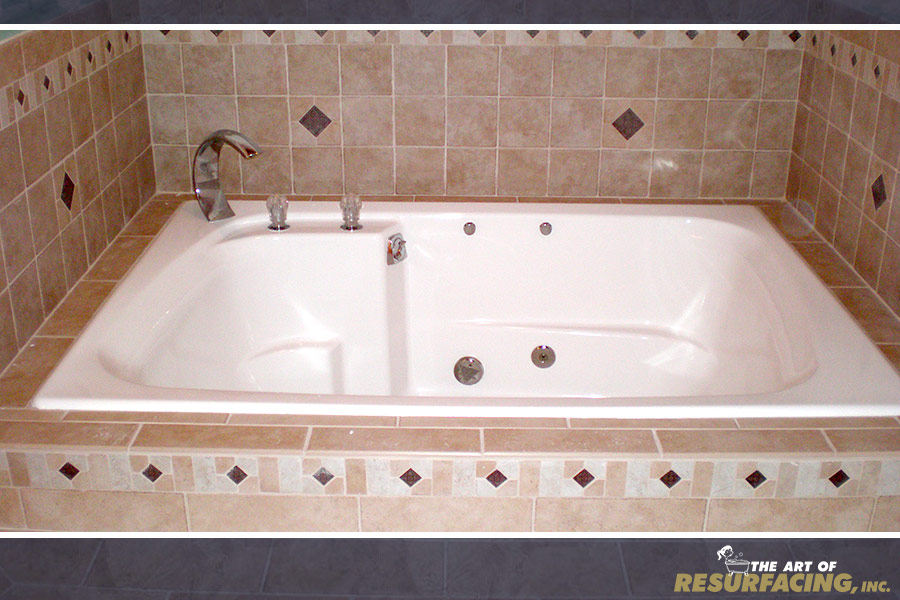
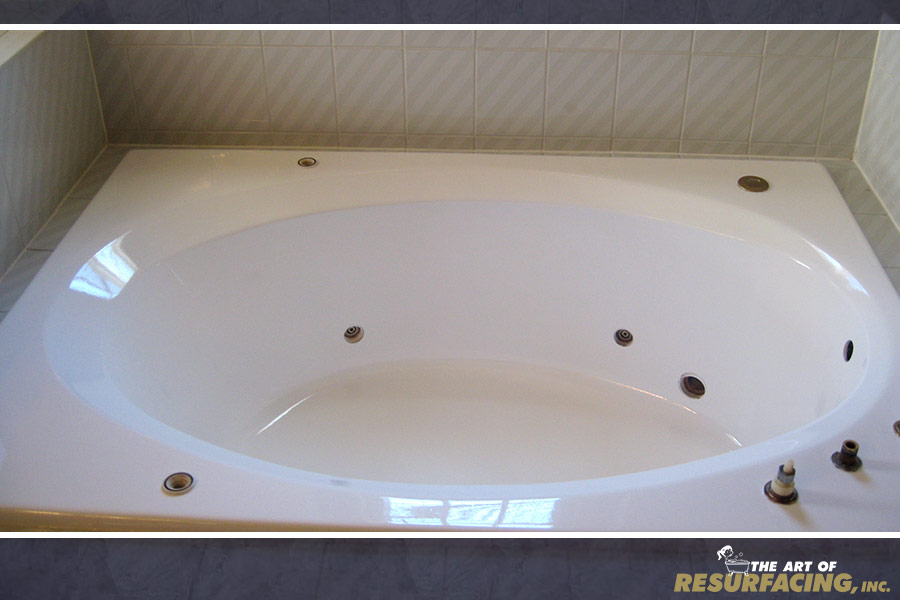
After Jacuzzi Resurfacing
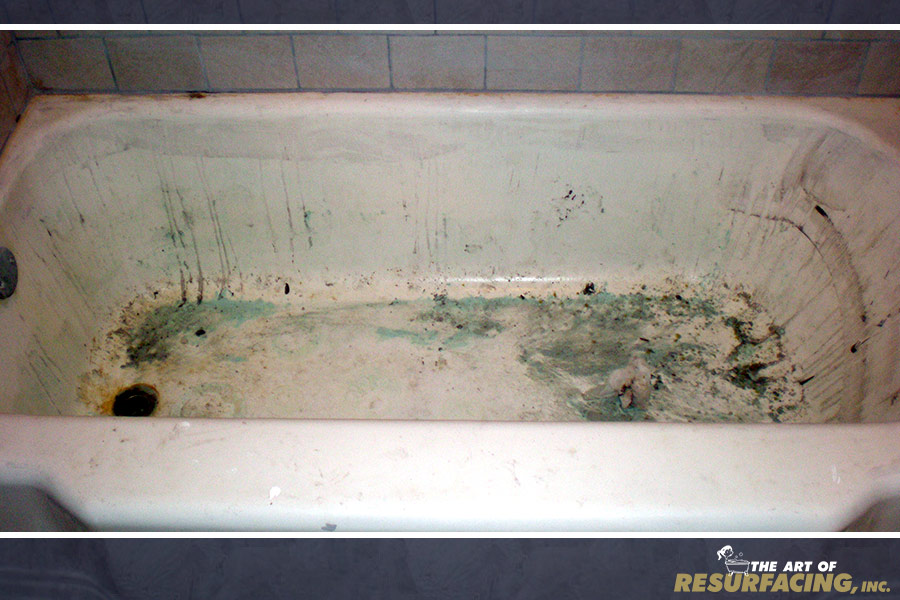
Before Cast Iron Tub Resurfacing
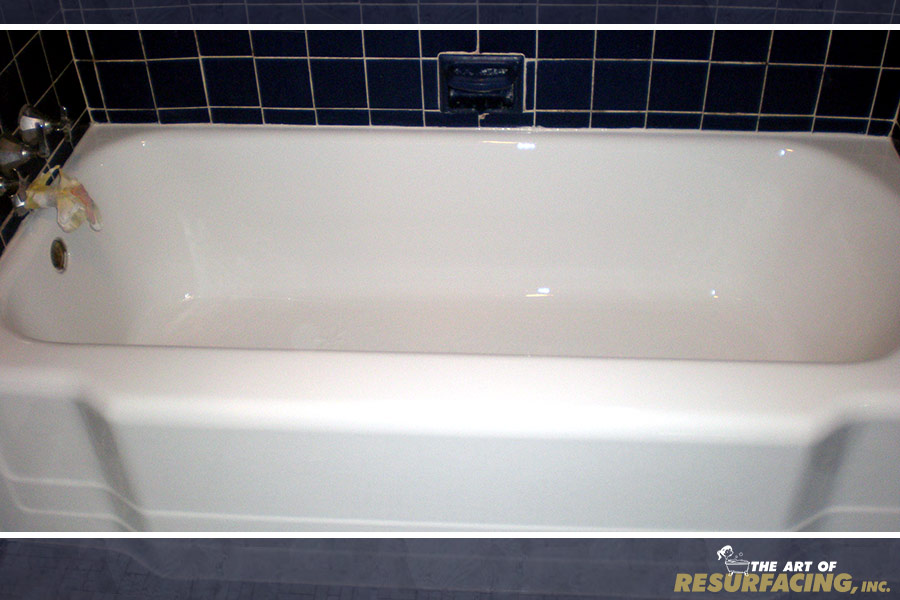
After Cast Iron Tub Resurfacing